Learn how to create and secure your Kontext Platform account with this comprehensive registration guide.
Getting an Invitation
As of our latest update, registration on the Kontext Platform is by invitation only. This ensures a controlled and secure environment for our users. To get an invitation code, please refer to our guide on how to get an invitation code.
Creating Your Account
Registration Process
Once you have an invitation code, you can proceed with the registration.
-
Navigate to the registration page
- Visit the Kontext Platform registration page.
- You’ll see the first step of the registration form.
-
Validate Your Invitation
- Email Address: Enter the email address to which the invitation was sent.
- Invitation Code: Enter the invitation code you received.
- Complete the CAPTCHA verification and click “Next”.
-
Complete Your Account Details
- After your invitation is validated, you’ll proceed to the next step.
- Name: Enter your first and last name.
- Password: Create a strong password that meets the security requirements.
- Preferred Language: Select your preferred language for the platform.
- Policies: Agree to the privacy policy, cookie policy, and terms of service.
- Complete the final CAPTCHA and click “Submit”.
Account Activation
After registering, you’ll need to verify your email address:
- Check your inbox for an email from Kontext (no-reply@kontext.tech)
- Open the verification email
- Click the “Activate account” button
- You’ll be redirected to the platform with your account activated
- You can now log in with your credentials
Two-Factor Authentication (2FA)
Securing Your Account
For enhanced security, we strongly recommend enabling two-factor authentication (2FA) on your account. This adds an extra layer of protection by requiring a verification code in addition to your password when logging in.
Setting Up 2FA
-
Access your account settings
- Log in to your Kontext Platform account
- Navigate to the 2FA settings page
-
Enable two-factor authentication
- Follow the setup instructions on the 2FA settings page
- You’ll need an authenticator app on your mobile device (such as Google Authenticator, Authy, or Microsoft Authenticator)
- Scan the QR code with your authenticator app
- Enter the verification code to complete setup
-
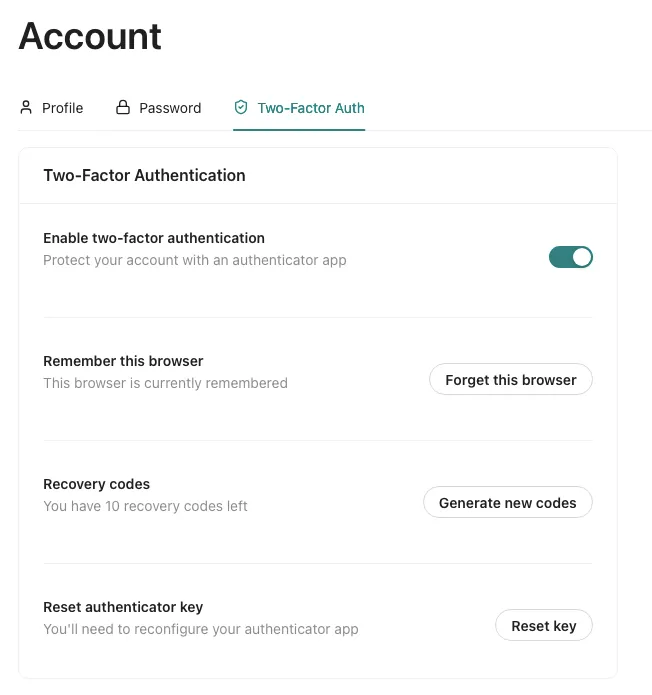
Save backup codes
- After enabling 2FA, make sure to save your recovery codes
- Store them in a secure location
- These codes can be used if you lose access to your authenticator app
After successful setup, the 2FA page looks like the following screenshot:
Single Sign-On (SSO)
Coming Soon
SSO integration will be available in future releases, allowing you to sign in using your organization’s identity provider. This will include support for:
- SAML 2.0
- OpenID Connect (OIDC)
- Active Directory integration
- Google Workspace
- Microsoft Azure AD
Contact your system administrator for information about SSO availability in your organization.
Next Steps
Once your account is set up and secured:
- Explore the Platform: Familiarize yourself with the interface and features
- Create Your First Project: Start organizing your information with projects
- Invite Team Members: Collaborate with others by adding them to your projects
- Configure Settings: Customize your experience through account settings
For more information, see our Getting Started guide to learn about using the platform effectively.